Email : info@24vc.com
YOUR IP: 216.73.216.26
Step 1:Open the Control Panel. |
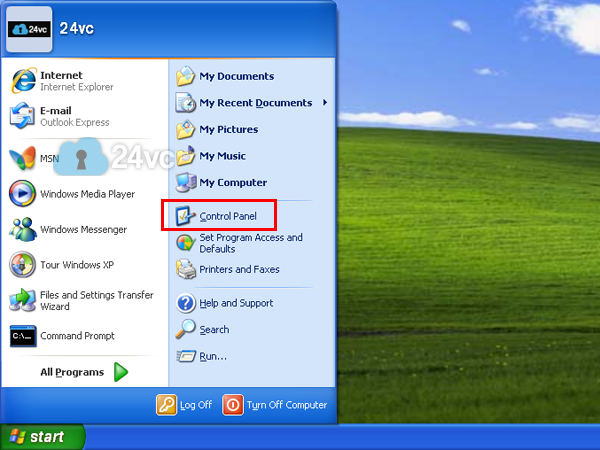 |
Step 2:Click Network and Internet connections. |
<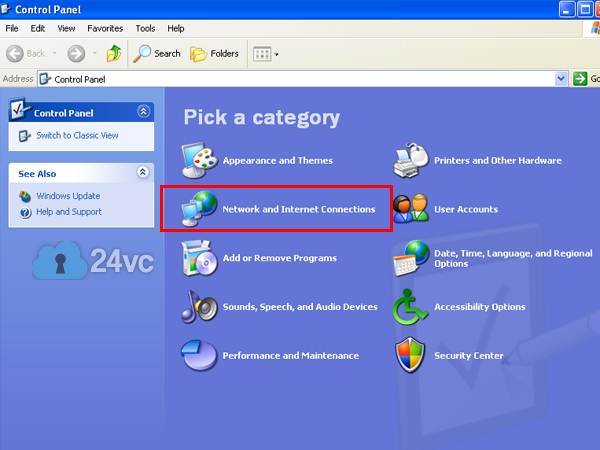 /> /> |
Step 3:Click Network Connections. |
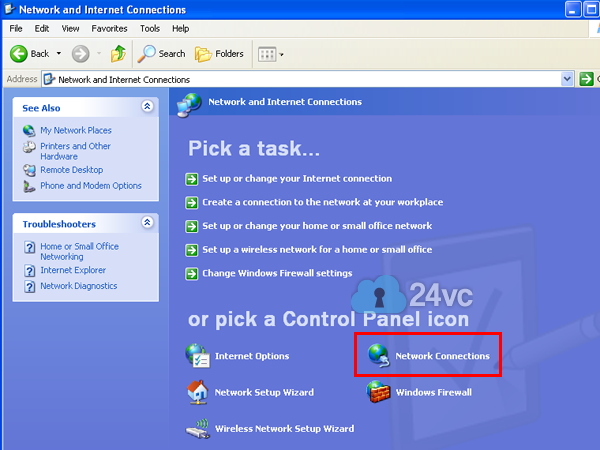 |
Step 4:Click Create a new connection. |
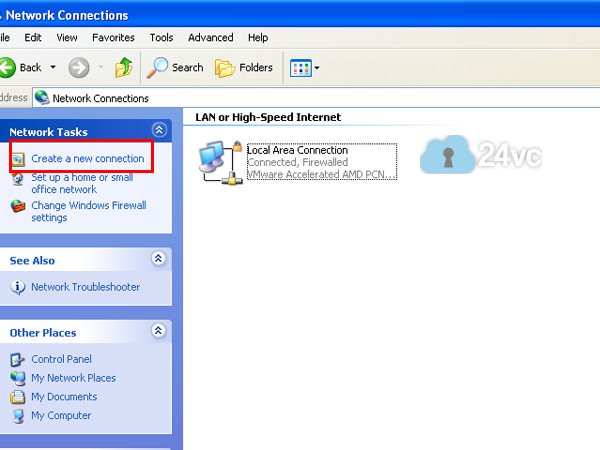 |
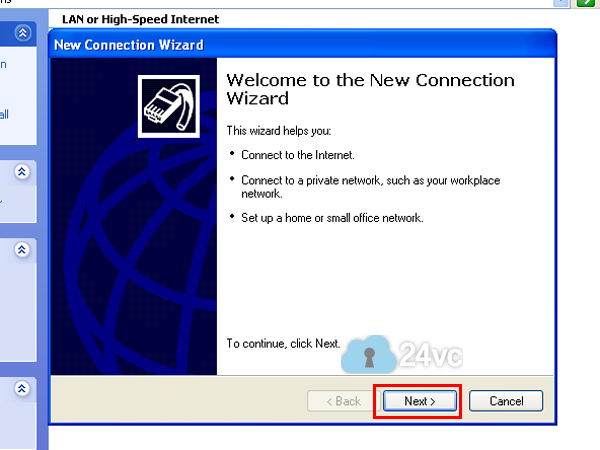
Step 5:Click Next. |
 |
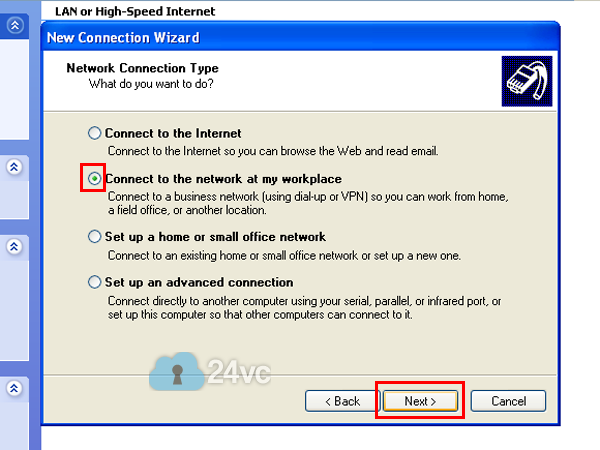
Step 6:Select Connect to the network at my workplace, then click Next. |
 |
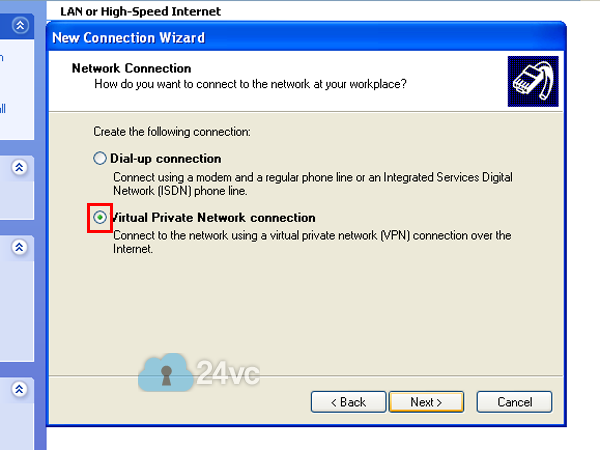
Step 7:Select Virtual Private Network connection, then click Next. |
 |
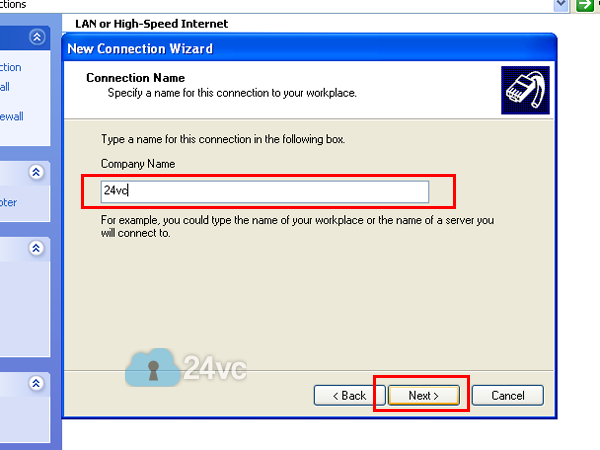
Step 8:For Company Name put 24vc, then click Next. |
 |
Step 9:Enter the Host Name we provided you in the activation email, afterwards hit Next. |
 |
Step 10:Select Add a shortcut to this connection, then click Finish. |
 |
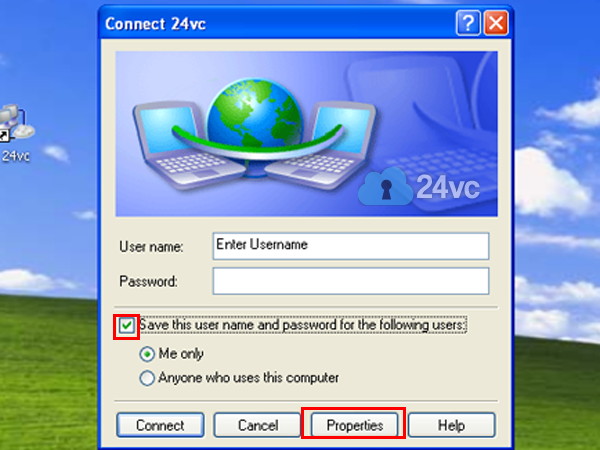
Step 11:You should now see the shortcut entitled 24vc on your desktop, open it and enter the username and password provided in the activation email. Then check Save this username and password, and click Properties. |
 |
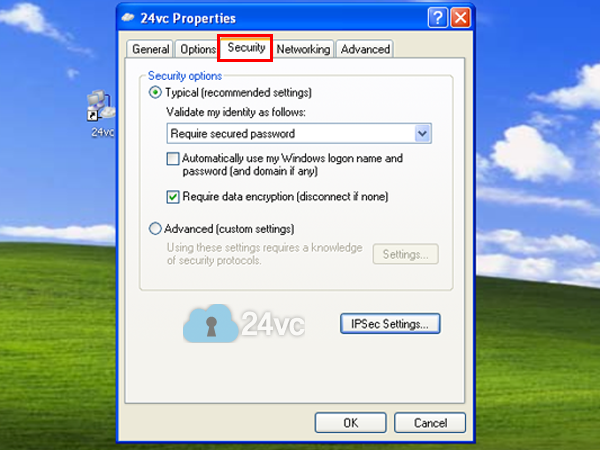
Step 12:Go to the Security tab. |
 |
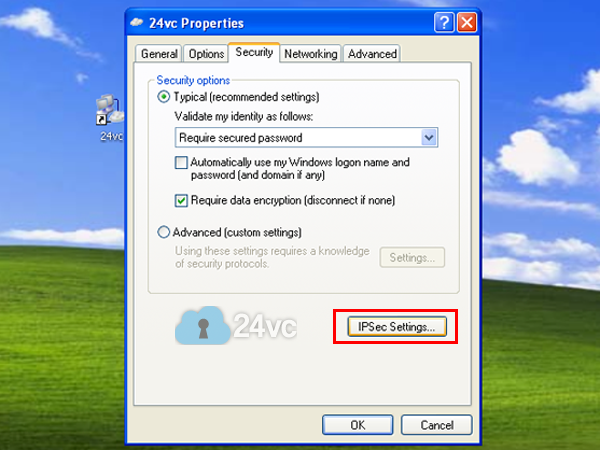
Step 13:Click IPSec Settings. |
 |
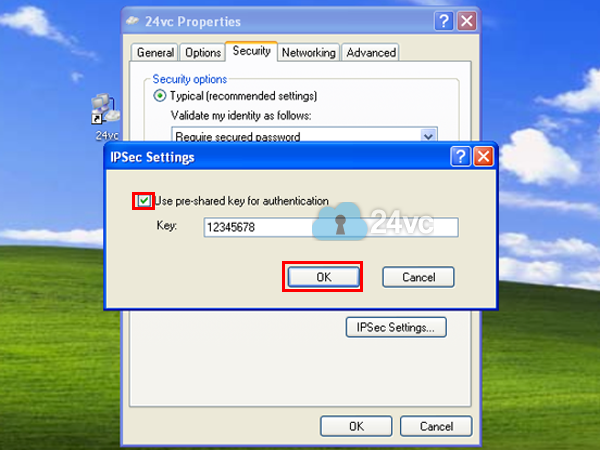
Step 14:Check Use pre-shared key for authentication, then enter 12345678 as the Key and click OK. |
 |
Step 15:Go to the Networking tab and select L2TP IPSec VPN. Uncheck File and Printer Sharing. Then click OK. |
 |
Step 16:Click Connect. |
 |