Email : info@24vc.com
YOUR IP: 216.73.216.49
| In this tutorial we will teach you how to easily block the internet traffic of a specific program, in the event that your VPN connection drops for any reason at all. We will do so by using the built in Windows Firewall Service, thus eliminating the need for any additional third party software. Following this tutorial will provide you with an extra layer of protection for your stealth accounts in case your VPN connection ever drops. For example you can have it setup so that if your VPN connection ever drops, Firefox would no longer be able to load any websites until the VPN was successfully reconnected. Thus preventing any chance of your real ip address leaking, and in doing so protecting your amazon, ebay, or paypal stealth accounts from being linked and suspended. |
|
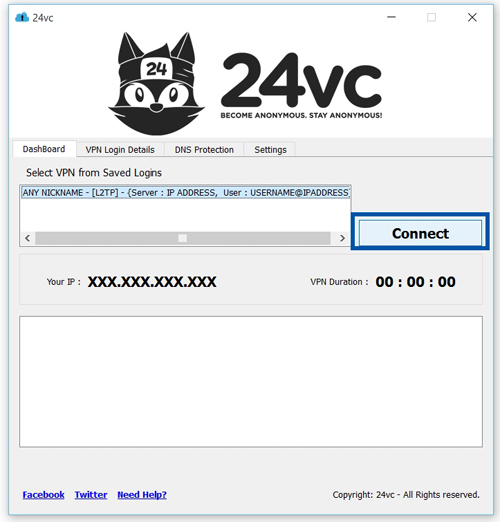
Step 1:The first step is to simply connect to the VPN. |
 |
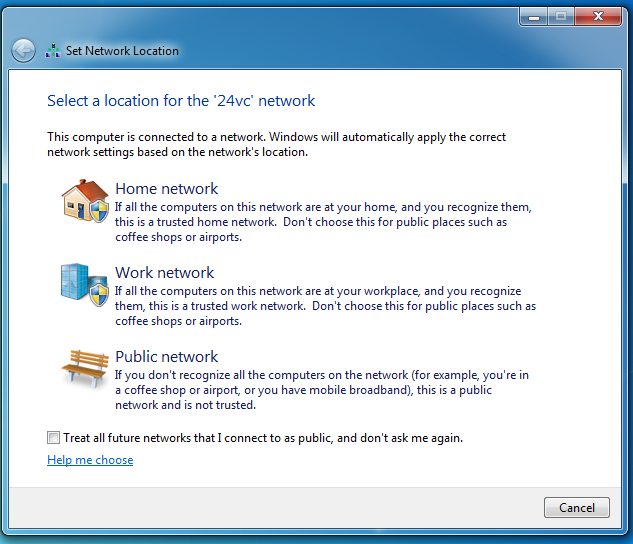
Step 2:When the following window appears, make sure to select Public Network. If the window does not appear automatically after connecting to the VPN, simply go to your Control Panel and then go to the Network and Sharing Center. Once there click the text below the network name to change it to Public Network. Also make sure that your local network is set to either Home or Office. |
 |
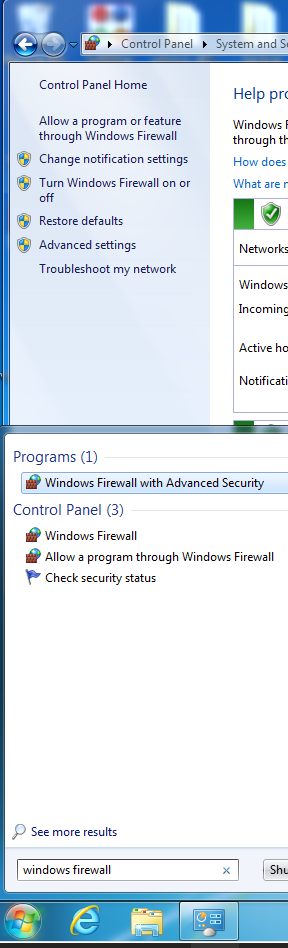
Step 3:Next open up the Windows Firewall with Advanced Security page, which you can find by searching in the search box located in the start menu or through the Control Panel. Make sure the firewall is activated. |
 |
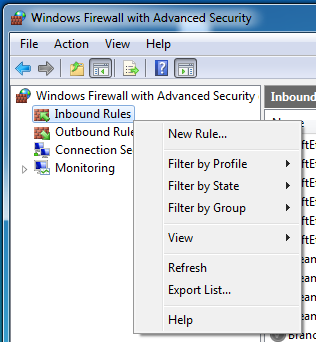
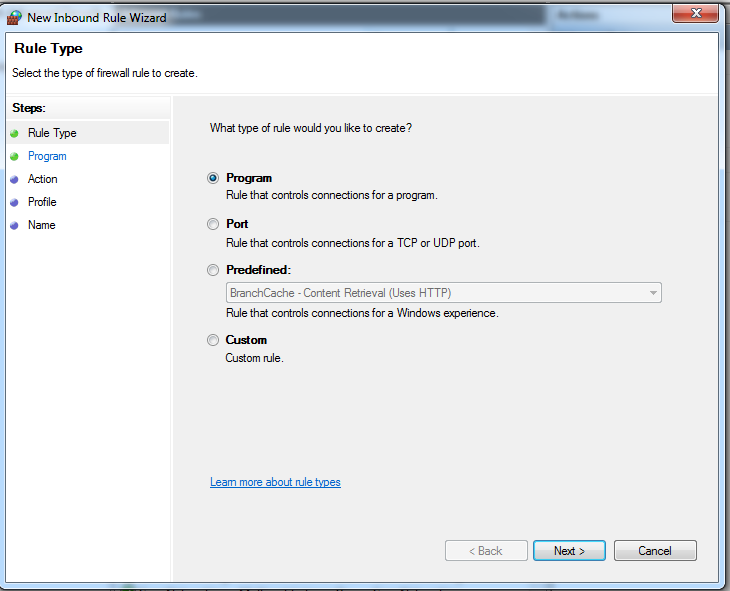
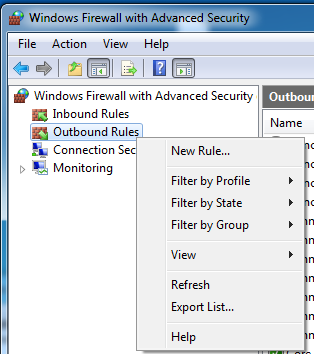
Step 4:Now it’s time to create the firewall rules, simply right click on Inbound Rules and select New Rule. |
 |
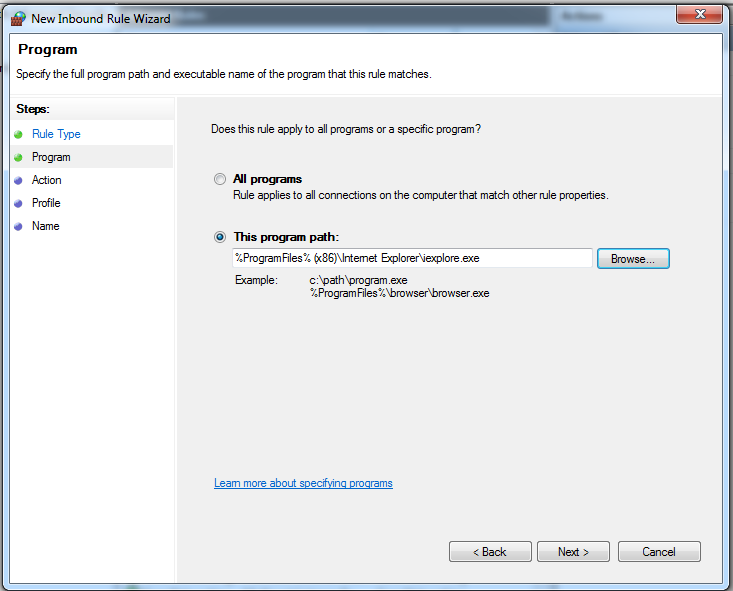
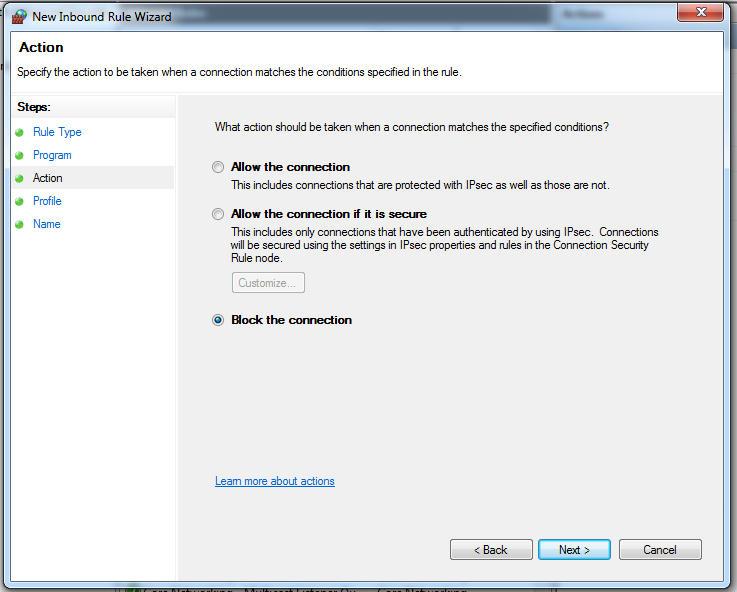
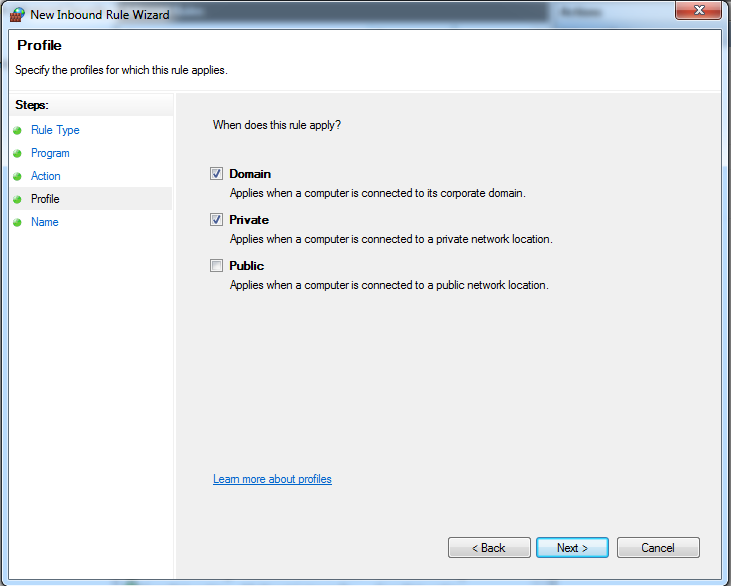
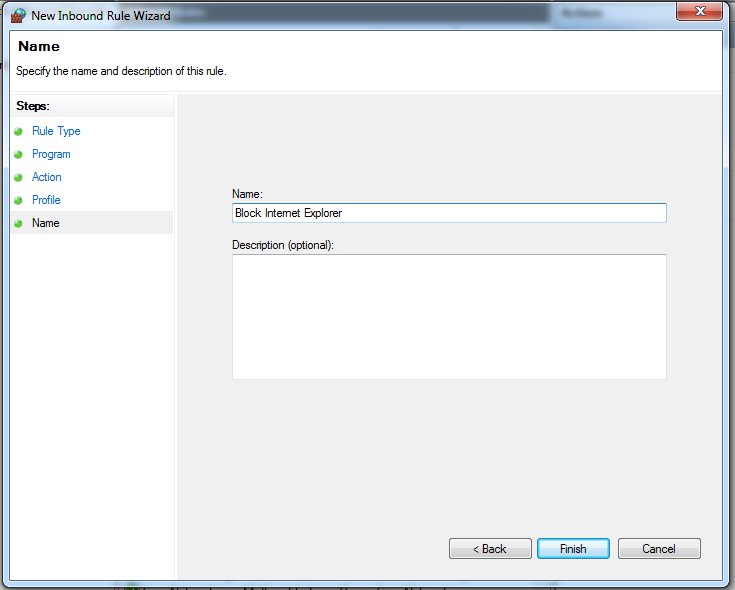
Step 5:Select Program then for the program path simply choose the browser (chrome, firefox, internet explorer, etc.) that you wish to block non-vpn traffic on. Then check to Block the Connection. Make sure to uncheck Public but keep Domain & Private checked. Afterwards simply name the rule to your liking and click Finish. |
 |
| Example of Program Paths: Internet Explorer (32 bit): %ProgramFiles% (x86)\Internet Explorer\iexplore.exe Internet Explorer (64 bit): %ProgramFiles%\Internet Explorer\iexplore.exe Firefox: %ProgramFiles% (x86)\Mozilla Firefox\firefox.exe Chrome: %ProgramFiles% (x86)\Google\Chrome\Application\chrome.exe |
 |
 |
|
 |
|
 |
|
Step 6:Now simply repeat steps 4 and 5 for Outbound Rules. |
 |
| Once these steps are completed, you should be all set! You should now be fully protected in the event that you’re ever disconnected from the VPN server. And you can always test the firewall rules to make sure their working properly by first manually disconnecting from the VPN, then once your disconnected you should not be able to load any websites on the program you specified in step 5. | |